


Do you remember those early school days? Where the teacher would have you do a Valentine’s Day card craft and pick a valentine of your own? Good times! So AirBrush is taking back to the good old days but with a twist. We’re going to show how to create an edit in the style of a V-day card – using all the AirBrush tools you already love. So envision that special someone front and center in your mind and let’s get started.
Step 1: Makeup
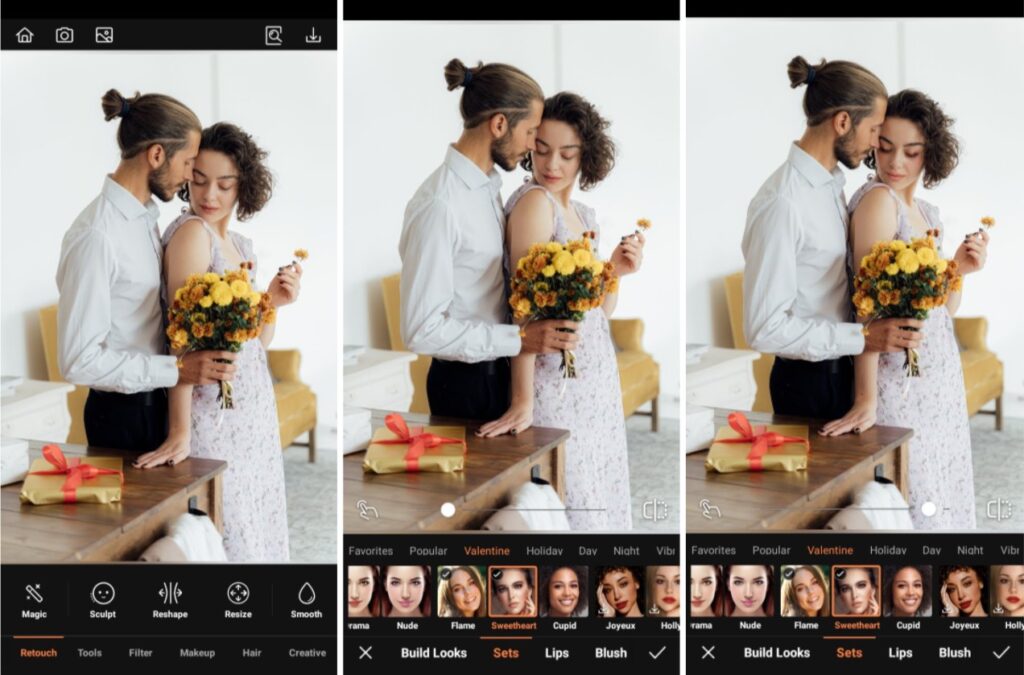
If you’re taking the time to edit a digital Valentine’s Day card for someone, you might as well get gussied up! Fortunately, you don’t personally have to do your own makeup. Our Makeup tool has curated three Valentine’s looks made just for this romance filled season.
- Go to the Makeup Tab
- Choose the Valentine’s Makeup set you like prefer. We used Flame here
- Adjust the strength of the filter using the center toggle
- Tap the checkmark to save your edit
Step 2: Background
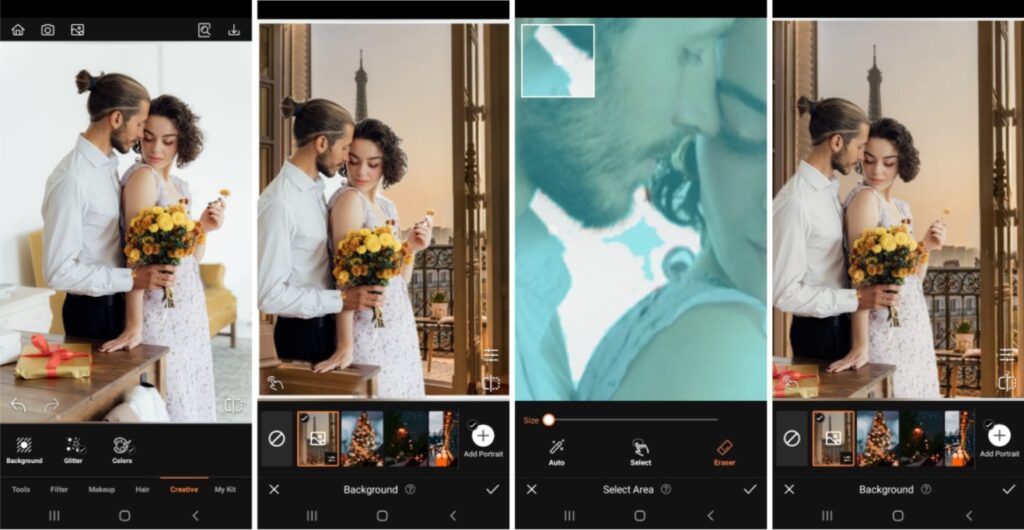
Next, in case you can’t be where you want to this Valentine’s, you can still get there (virtually) using our Background tool. Especially for this occasion, we’ve included a series of backgrounds that will set the perfect romantic mood for your Valentine’s Day card.
- Go to the Creative Tab on the Main menu.
- Select Background
- Scroll and choose any of the Valentine’s day backgrounds or upload your own.
- Adjust the scale of the subject by pinching in and expanding out.
- Use featurettes like Blend, Edge, Brightness, Blur or Eraser to perfect your edit.
- Tap the check mark to save your edit
Step 3: Filter
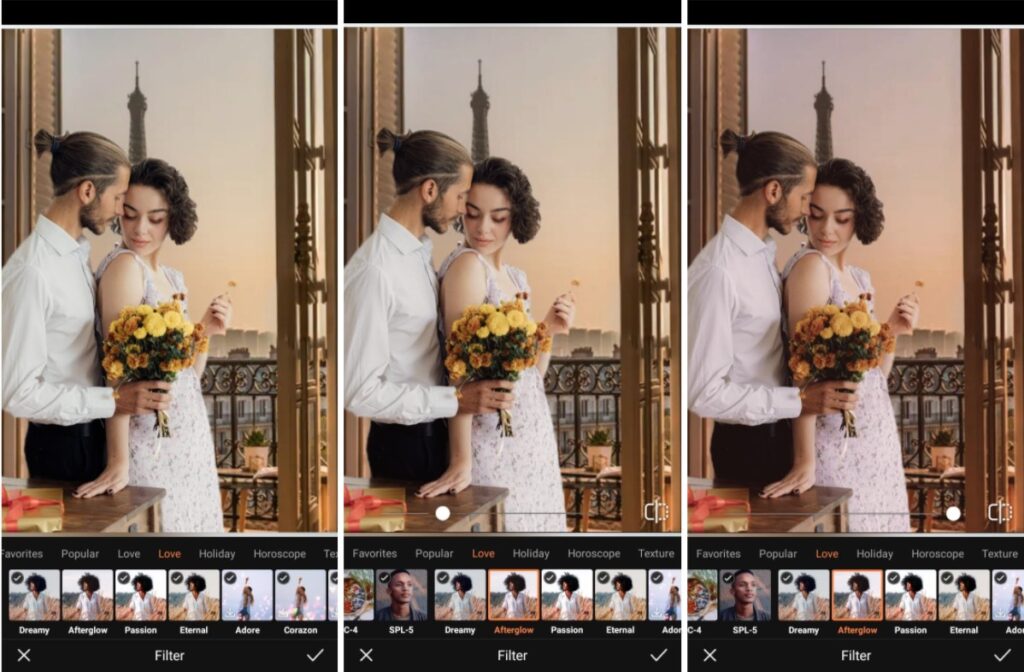
A photo edit isn’t really an edit without one of our Filters and we’ve got a collection of love-infused filters to really make your Valentine’s Day card stand out! From Passion to Dreamy, Afterglow to Eternal, you can set the mood from bright and open to sultry and mysterious. So pick your poison then use one of these Love Filters to express your feelings.
- Go to the Filters Tab on the Main Menu
- Select the Passion filter under the Atmosphere category
- Adjust the intensity by using the slide bar
- Tap the checkmark to save your edit
Step 4: Text

Finally, it’s time to say what you mean to say…with the Text feature. Brand new to the app and soon to become your new BFF, this tool allows you to apply copy to your edit to truly express yourself in your Valentine’s Day card. And, like with every other AirBrush tool, it’s completely intuitive and easy to use!
- Go to the Creative tab and select Text
- Enter the copy you want using the keyboard
- Select your preferred font and color treatment
- Use the cursor to place your Text anywhere you want on the photo
- Tap the checkmark to save your edit

And that’s it! Four simple steps to a Valentine’s Day card we think anyone will be happy to receive. Are you going to give this retro trend a try and ask someone to be your Valentine? If you do, let us know you used AirBrush, the easy photo editor by tagging the pic with #AirBrushApp. Then make sure to follow us @AirBrushOfficial on Instagram for all our latest tips, tricks and hacks!


